Cake Gallery Slideshow


Wednesday, February 24, 2010

An Artist's Life

I love art-themed parties for kids. So creative and full of activities to keep the kiddos busy! Even better is when the party is at an kids' art studio, so no artsy messes at your house.

I've been asked to create several art-themed cakes for parties at local childrens' art studios in town, and I always have fun with them. My most recent one was for a friend and enthusiastic supporter of my business, Carisa, for her adorable son, Robby. Robby's party was at Paint, Paper, Scissors.

Robby's cake was a mixture of buttercream and rolled fondant. I did an artist's palette with splotches of paint and a paintbrush in fondant. I usually don't do cakes entirely of fondant--few people ask for them--and I don't like the taste of fondant either. But I think fondant is great when used for the detailed decorations on a cake.


Isn't he the cutest little artist ever?!

I loved using the primary colors with the buttercream frosting and sprinkles. I'm a bit neurotic when I decorate with sprinkles and literally use tiny tweezers so I can put the exact color in the exact spot where I want it on the cake. Crazy, I know.

I hope I get another request for an art cake soon because I have a new idea for a multi-tiered cake with art accents . . . is anyone else having an art party soon?!

Tuesday, February 23, 2010

FoodieLicious: Ugly Cookies

This is one of those recipes from my childhood that I didn't like or appreciate much at the time, but grew to like much more as an adult! I rediscovered this cookie when I was 29 years old and needed a recipe that would make alot of cookies to give out as Christmas gifts to friends and co-workers. I called my Mom and asked for this recipe, the name of which I don't remember because I just think of them as 'Ugly Cookies' due to the way they look when they come out of the oven. They are a conglomeration of textures and tastes due to the many ingredients, but they taste really good!

The recipe was originally from Theresa, our next door neighbor when I was growing up in the 80s suburbs of Dallas. I haven't seen her smiling face in 23 years but remember her fondly with this recipe.

Theresa O’Dell’s "Ugly Cookies"

2 cups brown sugar
2 cups sugar
¾ cup butter, softened
1 cup veg oil
4 eggs
2 tsp vanilla
3 cup flour
2 tsp salt
2 tsp baking soda
3 cup uncooked oats
2 cup coconut
2 cup raisins
1 cup choc chips
1 cup chopped nuts

1) Cream sugars, butter, oil together.
2) Beat in eggs and vanilla.
3) Combine flour, salt, soda in another bowl. Add to earlier mixture.
4) Add all remaining ingredients to mixture.
5) Knead with hands to blend well.
6) Divide into 6 balls. Form each ball into a log wrapped in wax paper.
7) Refrigerate dough overnight.
8) Cut log into slices and place 2” apart on cookie sheet. (Dough will not be very firm.)
9) Bake at 350 for 10-12 min. Recipe makes MANY cookies!

Saturday, February 20, 2010

52 Cakes: Victoria Sponge Cake

(We devoured our Victoria Sponge without even taking any of our own pics!)

I learned a new recipe recently for a specific occasion, Girl Scout World Thinking Day. Thinking Day is celebrated by Scouts around the world on February 22, but my troops celebrated early this year on February 5 due to my surgery the following week.

I wanted to make a traditional English tea cake, and you can't get much more traditional than the Victoria Sponge Cake. The Victoria Sponge Cake was named after Queen Victoria, who favored a slice of this cake with her tea. Since my Scouts were celebrating with an 'Around the World' Tea Party, I thought the Victoria Sponge would be the perfect treat to represent a very proper British tea tradition.

I've made the cake twice already, and I personally love it and so did my Girl Scouts! It's super-easy and requires no fancy decoration. In fact, the Sponge Cake is never iced or decorated beyond a dusting of powdered sugar on top.

Victoria Sponge Cake Recipe

Cake Ingredients:
1 cup butter
1 cup sugar
2 cup flour
2 tsp. baking powder
4 eggs

Filling Ingredients:
1 cup whipping cream
2 tsp. sugar
raspberry jam

  1. Cream the butter until light. Slowly add the sugar. Beat until light and fluffy.
  2. Add eggs one at a time and beat well.
  3. Fold in the sifted flour and baking powder.
  4. Pour mixture into 2 prepared 8-inch round pans.
  5. Bake 25-30 minutes at 375 degrees until the cake pullsgently from sides or cake tester remains clean.
  6. Cool in pans for 10 minutes. Cool completely on wire rack.
  7. Whip cream and sugar to soft peaks.
  8. Place doily on cake plate. Put one cake layer on doily.
  9. Spread with raspberry jam and top with whipped cream.
  10. Place second layer bottom side up onto the filling.
  11. Sprinkle with powdered sugar. Garnish with fresh raspberries and mint leaves.
My Notes: Traditionally, you can use any flavor jam. I used cherry-blackberry jam.

Recipe from www.azcakerecipes.com
Photo from istockphoto.com

Wednesday, February 17, 2010

From the Page to the Cake: DecoPac Ideas

I think part of being a good cake designer is combining a good amount of inspiration and creativity with a healthy amount of decorating know-how. An inspired cake design on paper is great; an actual cake beautifully decorated with intricate detail is awesome.

Since 1998, I have taught over 500 students the basics of cake decorating, and a good number of those have also learned advanced cake decorating techniques and about cookies, cupcakes and candies from me as well. I'm very confident that those 500 students can bake, frost and decorate a simple yet elegant cake for just about any occasion.

I have also had the honor of teaching several employees of local bakeries, some of them recently hired and in need of basic decorating skills for their new job. I'm confident that they too have gone on to create amazing cakes at work.

So it makes me a little bit sad when I see really badly decorated cakes out there. Funny, yes (unless you actually paid for one of them). Outrageously funny even. But it also shows how many cake decorators are not trained for their jobs, and that's unfortunate. I'd hate any job I wasn't trained for, and I'm betting many of these folks don't love not knowing what they're doing.


The one thing many grocery store/discount store bakeries do provide is DecoPac training tools. DecoPac is the company that designs the grocery store cakes you can order from a catalog of choices. The cakes are often simply decorated and finished with plastic toy toppers. Americans must love them--they sell them in practically every large store bakery. I know my own kids love paging through the catalog at Target, oohing and aahing over the licensed character cakes! DecoPac, on their end, provides training tools for each of their cakes--detailed descriptions and instructions on how to make a cake that looks exactly like the design. Not particularly inspired, I will admit, but a fool-proof recipe for a decent cake if you follow the directions. And that's a big IF.

DecoPac designs get a bad rap from some people. Given how some so-called 'decorators' turn out their cakes, that's understandable. However, Sweetest Whimsy loves DecoPac because it's a great source of supplies as well as ideas for cakes and cupcakes. I don't love all of their ideas for sure, but I appreciate the idea of standardizing and streamlining cake designs for the big box store bakeries. These bakeries pay their too-few bakery employees not enough money and expect them to churn out a dozen cakes in a mere couple of hours; one-of-a-kind masterpieces they are not. (That's where the little ol' baker like me comes in!)

Here's an example of taking a cute DecoPac design and customizing it for my own clients:


Small Disney Princess Castle Cake by DecoPac

Larger version, same design

And here is what I did with it. I prefer not to go with all the plastic frou-frou, and pare down the design a bit. I've made this cake several times, each time a little bit differently from the last.


I love this cake even now because all little girls love it! Including my own daughter, whose birthday this cake celebrated. I also like having DecoPac as a source of inspiration and ideas whenever I need it!

Monday, February 15, 2010

FoodieLicious: Cookie Cake

In honor of Valentine's Day, I made a heart-shaped Cookie Cake yesterday. However, due to my recent surgery, this one was made with a few shortcuts, such as using pre-made cookie dough from the grocery store and having my kids decorate it instead of me! But no matter, our friends for whom we made it enjoyed it just the same.

Cookie Cakes had their day in the sun about a decade ago, when shaped cookie pans hit the market. These days, cupcakes and cupcake cakes have totally eclipsed cookie cakes, although you can still find them in nearly every mall in America. However, I still love cookie cakes! I like baking them in different shapes using my Wilton novelty pans and doing as much (or as little) detail with frosting as I feel like doing. That is the beauty of the cookie cake-- it's totally acceptable to have the "cake" showing, unlike a real cake!

Today I baked a heart-shaped Valentine cookie cake using my regular heart-shaped cake pan. Wilton sells a heart-shaped cookie pan, but I just use what I have. I usually use my own cookie recipe for the batter, but today I used grocery store chocolate chip cookie dough which always works in a pinch. I especially like the Central Market brand at HEB.

Here is my fool-proof recipe for a Shaped Cookie Cake:

1) Choose a Shaped Cake Pan that doesn't have too many deeply rounded edges. You can also just use a round, square or sheet cake pan.
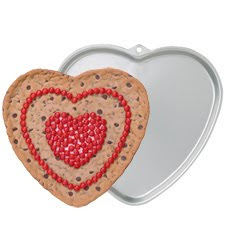
Wilton Heart Cookie Pan (or use a cake pan)
Enchanted Castle Cake Pan used for my both of my daughters' birthday cookie cakes!

2) Whip up a batch of cookie dough, or choose a pre-made cookie dough from the grocery store, your choice of flavor. You may need 1 1/2 to 2 packages depending on the size of your pan. A sugar cookie recipe will result in a smoother cookie cake surface than a recipe with additions like chips or nuts.
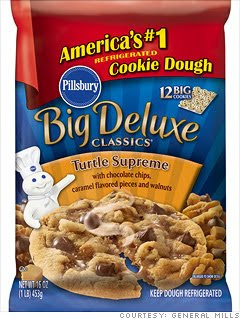
Pre-made cookie dough: an acceptable shortcut!

3) Line the bottom and sides of pan with one large piece of parchment paper (not wax paper) so there is extra paper around the edges. If you are using a fairly flat pan, this is easily done. If you have a pan with lots of corners and curves, it's a bit harder to do. The parchment is key to preventing any part of the cookie from sticking to the pan.


This one's easy to find at the grocery store.

4) If using pre-made dough from a tube, cut into 4 to 6 sections. Some brands come pre-cut into cookie slices; this is even better. Drop the sections or slices of dough evenly around the pan. Then, using a sheet of wax paper, press dough evenly, covering the entire pan. The wax paper prevents your hand from getting covered in sticky dough. If using homemade dough, drop large spoonfuls evenly around the pan. Using a sheet of wax paper, press dough evenly, covering the entire pan.

5) Bake according to cookie recipe directions (usually 10-12 minutes at 350 degrees). Cool for about 10 minutes, then grasp the extra parchment paper at the sides and carefully lift cookie cake onto a cooling rack. You can also invert cookie cake onto a cooling rack if you're using a shallow pan, such as a cookie cake pan.

6) When cookie cake has cooled completely, carefully peel off the parchment paper and transfer to a cake board or plate. Decorate with frosting and decorations as you would a regular cake, but don't feel like you have to cover every inch of the surface. You want a little 'cookie' showing through!
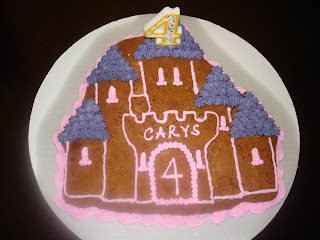
Castle Cookie Cake for my daughter's 4th birthday, made with cranberry-white chocolate cookie dough! It was slightly overbaked, but it still tasted good!

So that's how easy it is! What cracks me up is when friends groan about how difficult it is to make a perfectly round (or whatever shape) cookie cake; very often, they are using a regular cookie sheet and just plopping down a round hunk of cookie dough, hoping it will keep its shape. A cake pan or cookie pan solves that problem easily!

Friday, February 12, 2010

52 Cakes: Cake Balls

Wow, it seems like forever since I shared a cake recipe, what with my erratic blogging. "52 Cakes" is back this week, and this week's recipe is a variation on cake. A very popular one right now, actually. Cake Balls. So unbelievably simple, yet trendy at the same time. Cake balls are the sophisticated cousin of the cheerful cupcake.

As with cupcakes, you can customize cake balls in so many different ways. There are endless combinations of cake and frosting flavors, plus your choice of candy coating and decorations. And so easily devoured at once!

I like to make cake balls out of extra cake I have left over when I create shaped cakes, but you can start with a basic recipe like this one if you don't have any.

My Favorite Chocolate Cake Balls: Chocolate Cake, Chocolate Frosting, Chocolate Coating!

Basic Cake Balls

1 (18.25-ounce) boxed cake mix plus ingredients called for on box
1 (16-ounce) can prepared frosting
Almond Bark Coating or Confectionery Wafer Coating (both recipes follow)

Bake the cake according to package instructions. While warm, crumble the cake into a bowl with a hand mixer to a fine texture. Mix in frosting to make a paste, using 3/4 to a full can of frosting, according to taste. Chill the mixture for at least 2 hours.

Using a melon baller or your hands, form the mixture into 1 ½ -inch balls. Place the balls on wax paper; freeze at least 6 hours.

Working in small batches, remove the balls from the freezer and dip the balls into warm, melted Almond Bark Coating or Confectionery Wafer Coating, using toothpicks or forks to manipulate the balls. Remove the balls. Place the balls on wax paper to harden.

Makes about 30 cake balls.

Almond Bark Coating: In a double boiler, melt one (20-ounce) package vanilla- or chocolate-flavored almond bark, stirring constantly. Or, in a tall, narrow container, microwave almond bark for 45 seconds on High (100 percent power). Continue to heat in 15-second intervals, stirring between intervals, until melted; be careful not to scorch.

When almond bark is melted, stir in 1 teaspoon vegetable oil. If desired, stir in oil-based coloring drop by drop until you achieve the desired color.

Confectionery Wafer Coating: Melt 48 ounces confectionery wafers in double boiler or microwave oven per instructions for Almond Bark Coating. Omit oil. If desired, stir in oil-based coloring drop by drop until you achieve the desired color.

Source: Lea Worth-Portocalis, as printed in the Dallas Morning News

My Notes: I have used Baker's Chocolate and Ambrosia Chocolate Bark to coat the cake balls. I prefer Baker's.

Also posted on the Paper Dolls blog

Thursday, February 11, 2010

So In Character: Classic Pooh


As I've mentioned before, until a couple of years ago, I'd never done a Classic Winnie the Pooh cake. I'd done the brightly colored Disney Pooh in various forms many times, but never a more low-key, pastel version of the loveable childhood friend.

So when one of my best girlfriends told me her new baby's nursery theme was Pooh, I jumped at the chance to do a Classic Pooh themed shower for her! The invitations were sweet but still boyish enough for her soon-to-arrive Sam:

I love this invitation, which we printed in a light sage green ink. All Classic Pooh and other Disney theme invitations are from my fabulous Carlson Craft Disney album of wedding and social invitations and accessories. It's been my go-to source for all of my kids' Disney-themed parties (and we've had quite a few of them over the years.) My girls love picking out their party invitations from the big blue Disney book!

Designs for the cake followed the invitation, using the same muted pastel colors of Classic Pooh. I have several cake pans shaped like Pooh, but chose the 3-D pan so the cake could really be a centerpiece at the shower. And he certainly was! The shower's co-host thought the cake was the cutest thing (as I thought the same of her watermelon shaped like a baby carriage!).


Pooh and his Hunny Pot, surrounded by yummy cookies!

Classic Pooh logo from Sweetest Whimsy's Carlson Craft site