In honor of Valentine's Day, I made a heart-shaped Cookie Cake yesterday. However, due to my recent surgery, this one was made with a few shortcuts, such as using pre-made cookie dough from the grocery store and having my kids decorate it instead of me! But no matter, our friends for whom we made it enjoyed it just the same.
Cookie Cakes had their day in the sun about a decade ago, when shaped cookie pans hit the market. These days, cupcakes and cupcake cakes have totally eclipsed cookie cakes, although you can still find them in nearly every mall in America. However, I still love cookie cakes! I like baking them in different shapes using my
Wilton novelty pans and doing as much (or as little) detail with frosting as I feel like doing. That is the beauty of the cookie cake-- it's totally acceptable to have the "cake" showing, unlike a real cake!
Today I baked a heart-shaped Valentine cookie cake using my regular heart-shaped cake pan. Wilton sells a heart-shaped cookie pan, but I just use what I have. I usually use my own cookie recipe for the batter, but today I used grocery store chocolate chip cookie dough which always works in a pinch. I especially like the Central Market brand at HEB.
Here is my fool-proof recipe for a Shaped Cookie Cake:
1) Choose a Shaped Cake Pan that doesn't have too many deeply rounded edges. You can also just use a round, square or sheet cake pan.

Wilton Heart Cookie Pan (or use a cake pan) Enchanted Castle Cake Pan used for my both of my daughters' birthday cookie cakes!
 2) Whip up a batch of cookie dough, or choose a pre-made cookie dough from the grocery store, your choice of flavor. You may need 1 1/2 to 2 packages depending on the size of your pan. A sugar cookie recipe will result in a smoother cookie cake surface than a recipe with additions like chips or nuts.
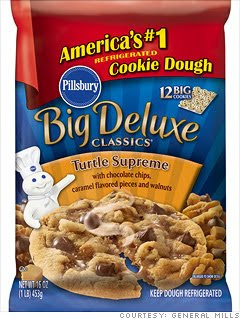
Pre-made cookie dough: an acceptable shortcut!
3) Line the bottom and sides of pan with one large piece of parchment paper (not wax paper) so there is extra paper around the edges. If you are using a fairly flat pan, this is easily done. If you have a pan with lots of corners and curves, it's a bit harder to do. The parchment is key to preventing any part of the cookie from sticking to the pan.

This one's easy to find at the grocery store.
4) If using pre-made dough from a tube, cut into 4 to 6 sections. Some brands come pre-cut into cookie slices; this is even better. Drop the sections or slices of dough evenly around the pan. Then, using a sheet of wax paper, press dough evenly, covering the entire pan. The wax paper prevents your hand from getting covered in sticky dough. If using homemade dough, drop large spoonfuls evenly around the pan. Using a sheet of wax paper, press dough evenly, covering the entire pan.
5) Bake according to cookie recipe directions (usually 10-12 minutes at 350 degrees). Cool for about 10 minutes, then grasp the extra parchment paper at the sides and carefully lift cookie cake onto a cooling rack. You can also invert cookie cake onto a cooling rack if you're using a shallow pan, such as a cookie cake pan.
6) When cookie cake has cooled completely, carefully peel off the parchment paper and transfer to a cake board or plate. Decorate with frosting and decorations as you would a regular cake, but don't feel like you have to cover every inch of the surface. You want a little 'cookie' showing through!
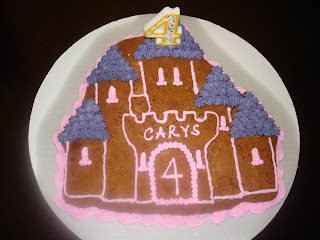
Castle Cookie Cake for my daughter's 4th birthday, made with cranberry-white chocolate cookie dough! It was slightly overbaked, but it still tasted good!
So that's how easy it is! What cracks me up is when friends groan about how difficult it is to make a perfectly round (or whatever shape) cookie cake; very often, they are using a regular cookie sheet and just plopping down a round hunk of cookie dough, hoping it will keep its shape. A cake pan or cookie pan solves that problem easily!
 Please click on the digital card to enlarge!


 Shamu the killer whale carved out of cake and rice krispy treats and covered in buttercream. Finished with an M&M eye!

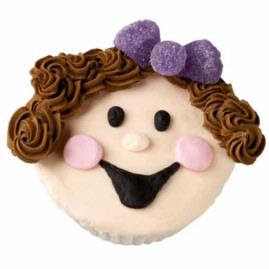
 Poodle Skirt Girl for a 1950s Sock Hop birthday party!
 Who's the cutest mouse in the house?!


 Minnie Mouse cake in fondant and buttercream icing for a sweet little two year old's birthday.
 As a Wilton Method-trained instructor, I provide:
 Marble Bark using Chips Ahoy! I use whatever I like!
 Dublin Dr. Pepper bottles at DublinDrPepper.com


 Our 2009 hamantaschen, fresh from the oven!
 Very proud of her filling and folding efforts
 Hard at work rolling and cutting the dough

 (We devoured our Victoria Sponge without even taking any of our own pics!)
 Small Disney Princess Castle Cake by DecoPac
 Larger version, same design


 Enchanted Castle Cake Pan used for my both of my daughters' birthday cookie cakes!


 My Favorite Chocolate Cake Balls: Chocolate Cake, Chocolate Frosting, Chocolate Coating!


 Pooh and his Hunny Pot, surrounded by yummy cookies!

 Neiman Marcus: Texas Icon
 Image from Google Images


